Creating an enrichment source Preview
This wizard covers enrichment from a third-party data provider. To derive a field with a language model instead, see AI Fields.
Go to External Data Enrichment in the left sidebar and click Add. The wizard has six steps; you can move back and forth freely, and nothing is created until the last one.
Step 1 — Provider
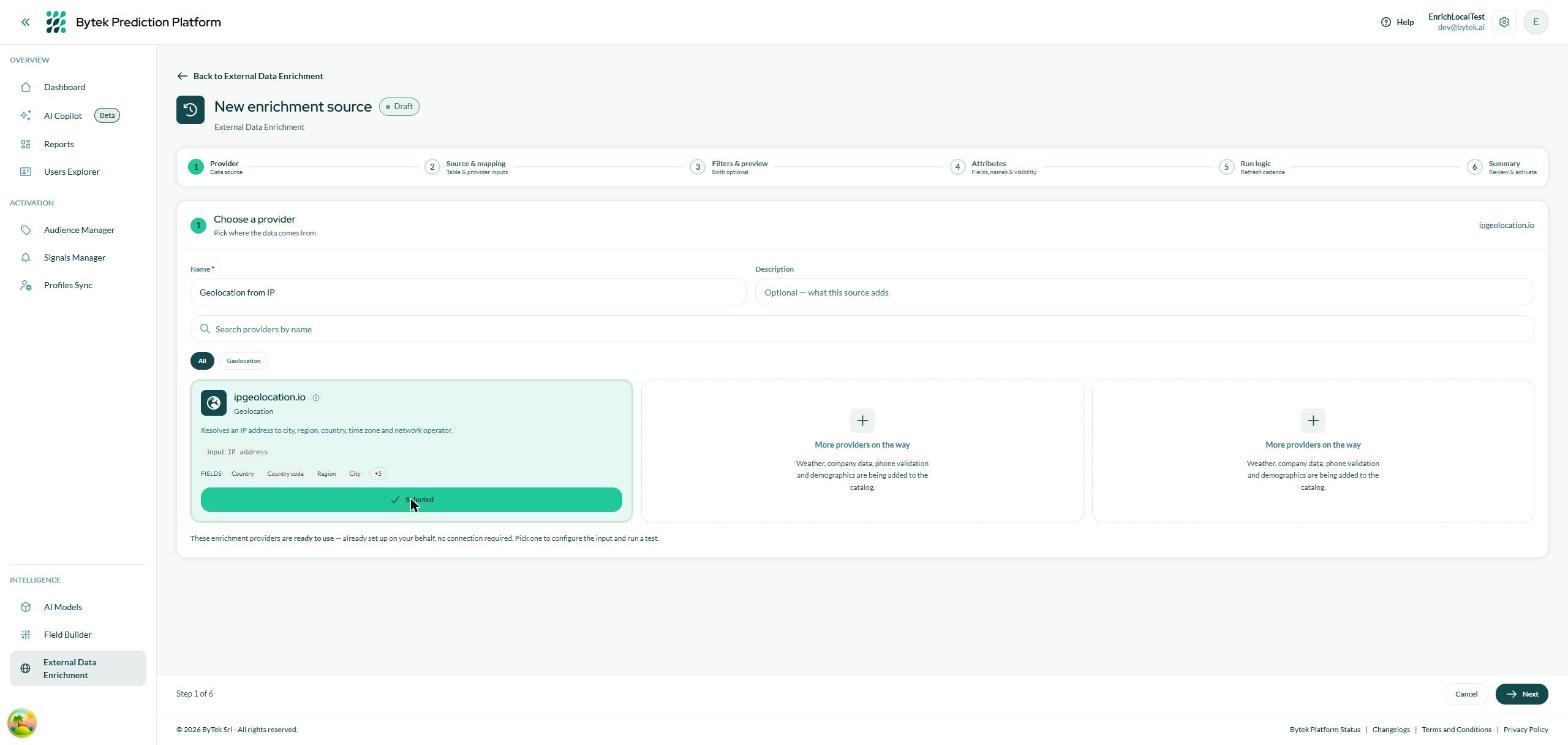
Give the source a name, then pick the provider. Each card says what the provider needs as input and what it gives back.
Give the source a name you will recognise in the list — "Geolocation from IP" is clearer than "Enrichment 1" — and an optional description.
Then choose a provider. Each card shows what it needs (its input) and a preview of the fields it returns. Today the catalog offers ipgeolocation.io, which turns an IP address into location and network details; more providers are being added.
The provider cannot be changed later. The columns it creates carry its name, so switching provider means creating a new source.
Step 2 — Source table & input mapping
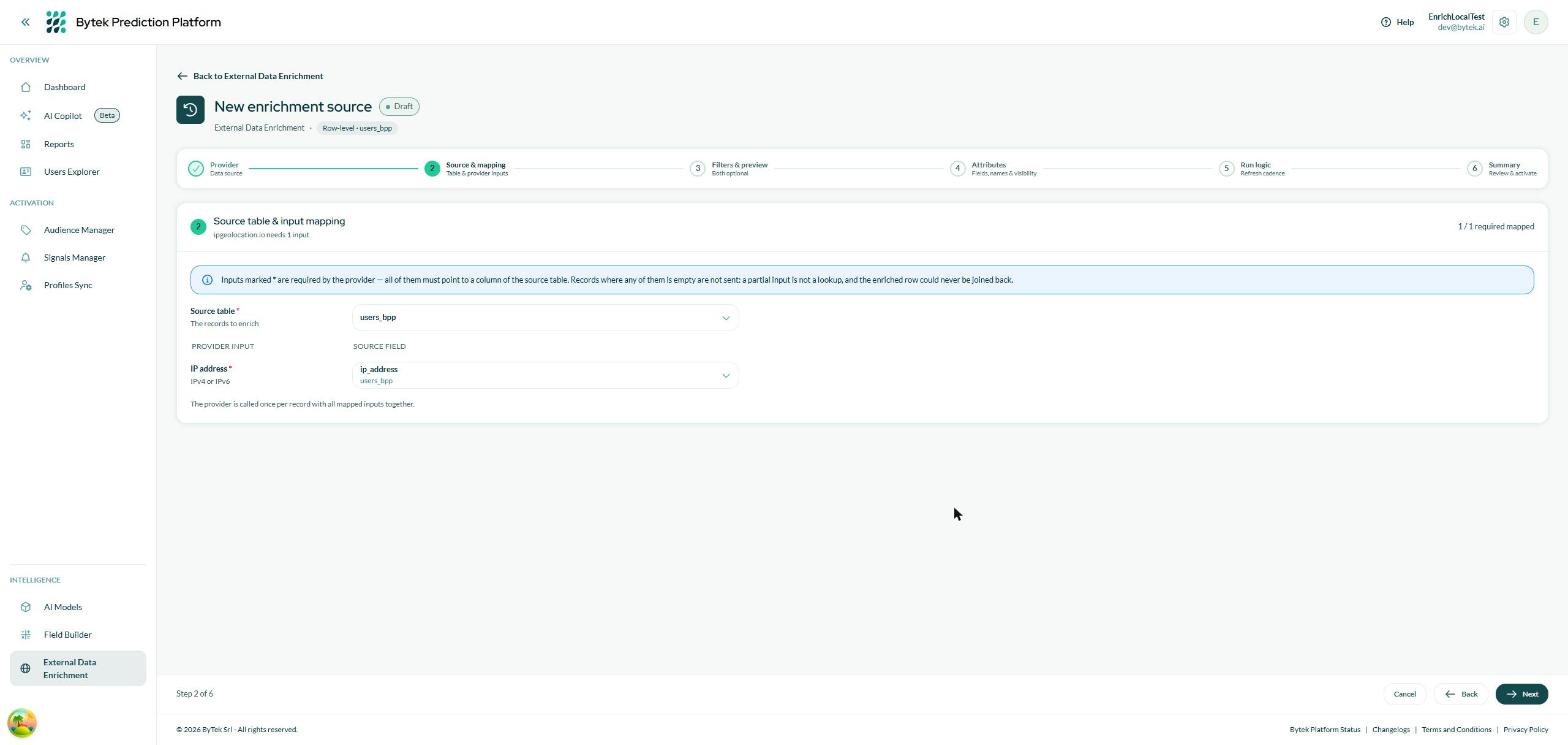
Pick the table to enrich, then point the provider's input at the column that holds it.
Two choices here:
- Source table — the table whose records you want to enrich. The new columns will be added to this table.
- Input mapping — the provider needs a value to look up. Tell it which column of your table holds that value: for ipgeolocation.io, the column containing the IP address.
When you pick a column, BPP shows you a sample of its real values, so you can confirm you chose the right one before spending anything.
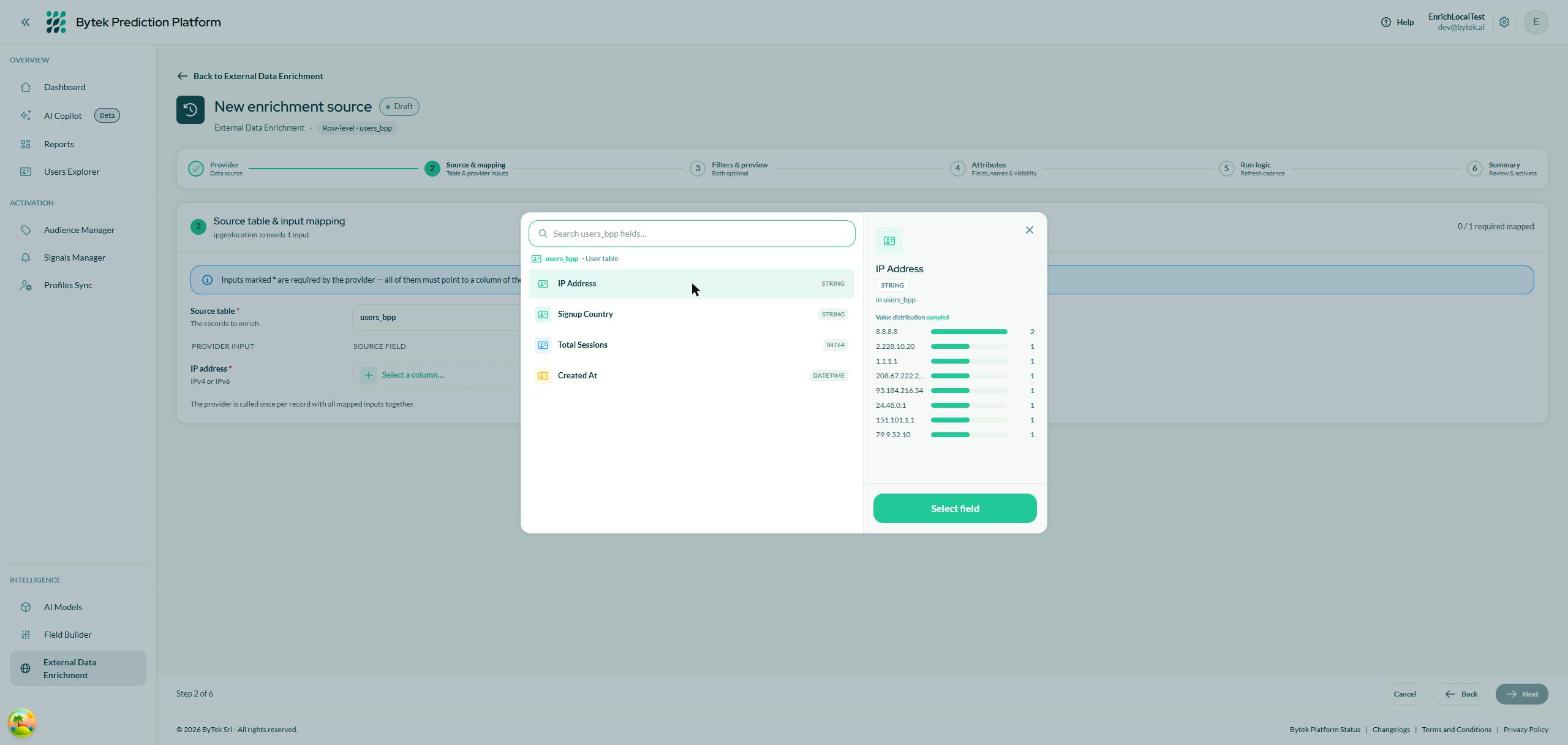
The column picker previews the values actually in the column — the quickest way to catch the wrong choice.
If a record has no value in the mapped column, there is nothing to look up: it is not sent to the provider, and its enrichment columns stay empty.
Step 3 — Filters & preview
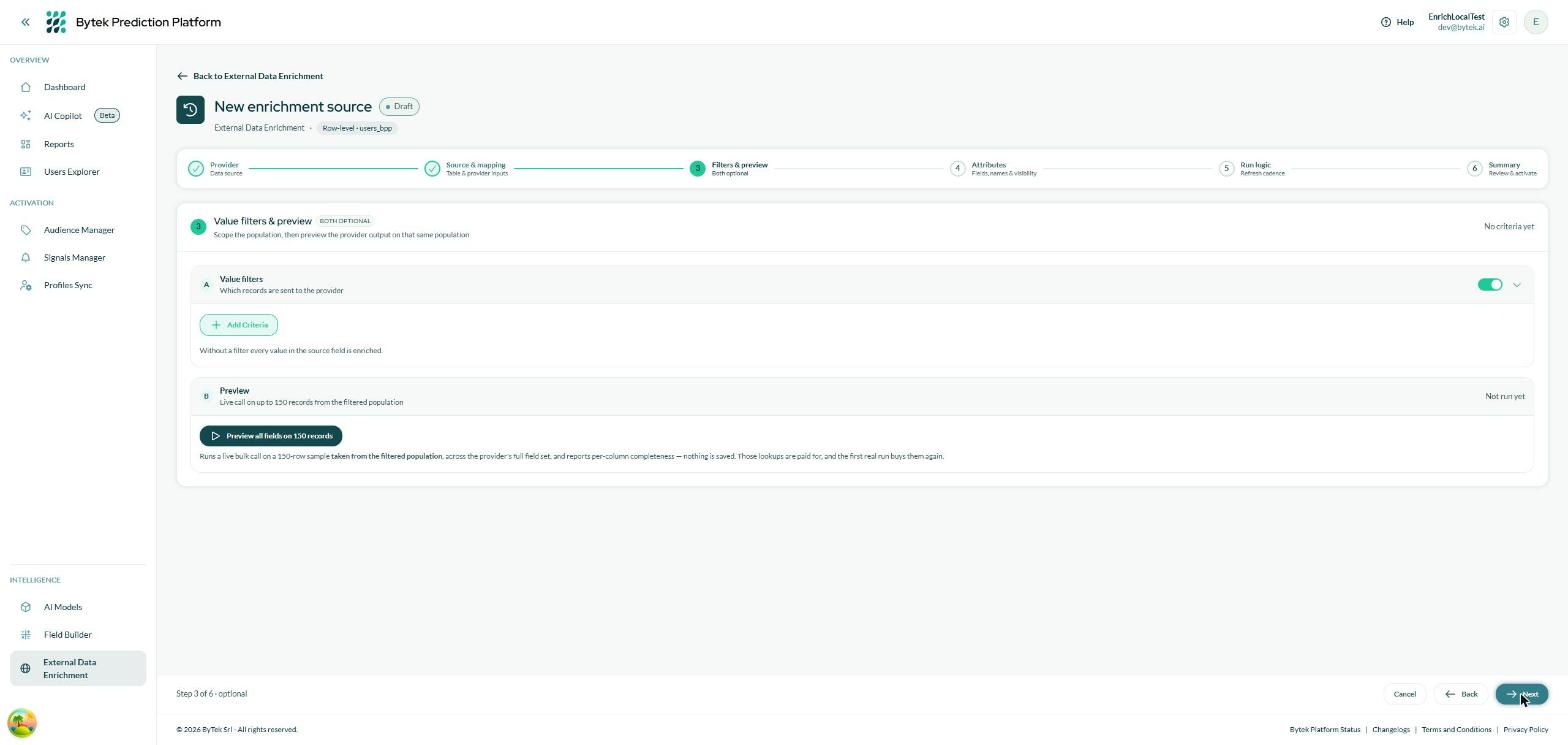
Both parts of this step are optional — but running the preview is what tells you whether the data is worth buying.
Value filters narrow down which records get enriched. Without a filter, every value in the column is looked up. With one, only the records matching your conditions are — useful when you only care about a segment, and it keeps the cost down. Filters can also use fields from other tables (for example: only users who bought something in the last 90 days).
Preview runs a real lookup on a small sample of the records the filters select, and shows you what comes back.
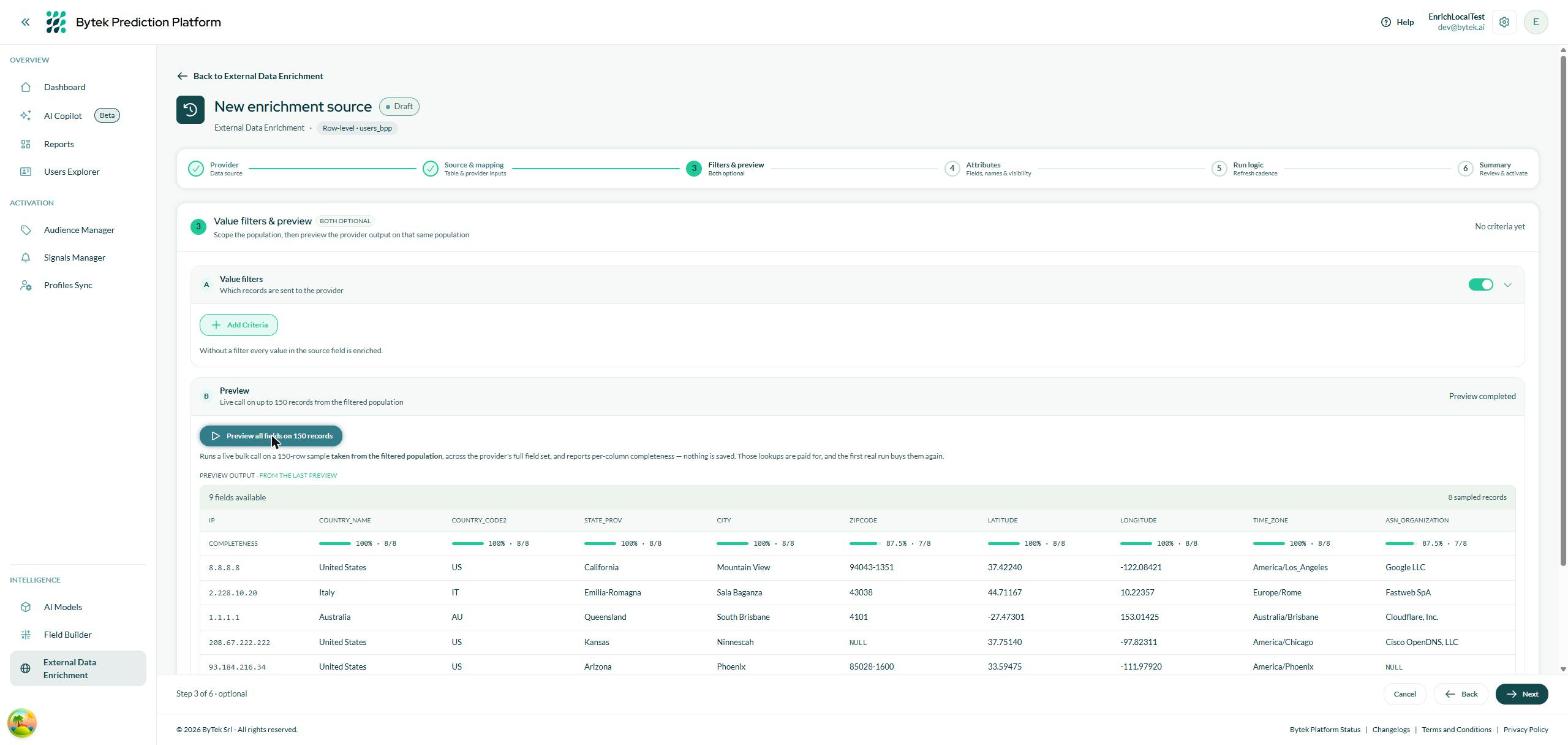
The preview reports every field the provider offers, with a completeness percentage and the actual values for the sampled records.
The completeness bar is the number to look at: it says how often the provider actually returned a value for that field on your data. A field at 100% is reliable; one at 40% will be empty for most of your users. This is how you decide which fields are worth keeping in the next step.
The preview samples the population your filters select. Setting filters afterwards would mean the completeness you saw was measured on different records from the ones that actually get enriched.
The sampled values are bought from the provider, and the first real run buys them again. It is deliberately limited to a handful of calls per hour.
Step 4 — Attributes
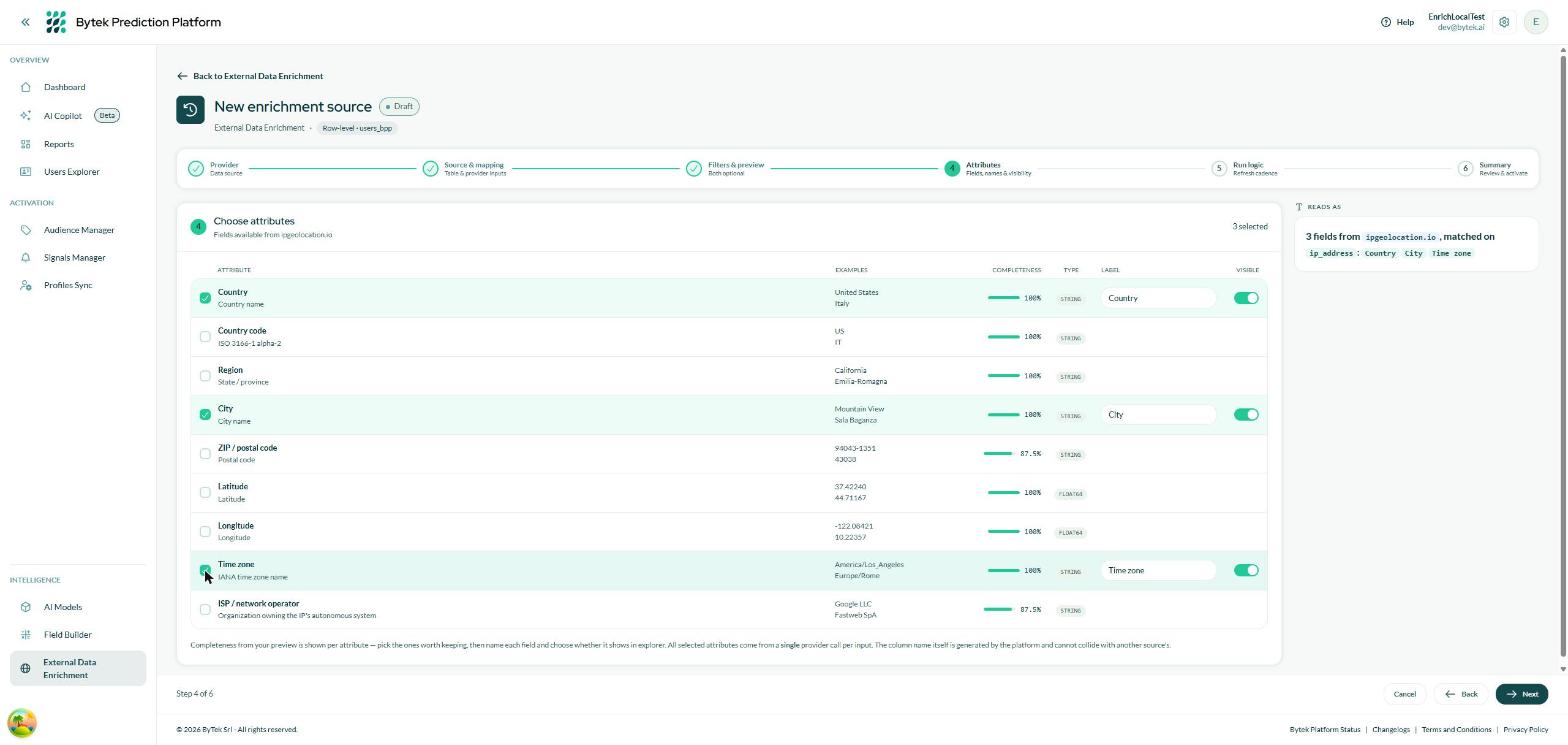
Pick the fields to add to your table. Examples and completeness come from the preview you just ran.
Tick the fields you want. For each one you can set:
- Label — the name shown across the platform. Pick something your team will recognise in the audience builder.
- Visible — whether the field appears in the pickers. Leave it on unless you want the column to exist without cluttering the lists.
The panel on the right, Reads as, restates your configuration in plain language, so you can sanity-check it without going back through the steps.
Selecting more fields costs nothing extra with this provider: one lookup returns the whole set. Choosing fewer fields keeps your schema tidy, not your bill lower.
Step 5 — Run logic
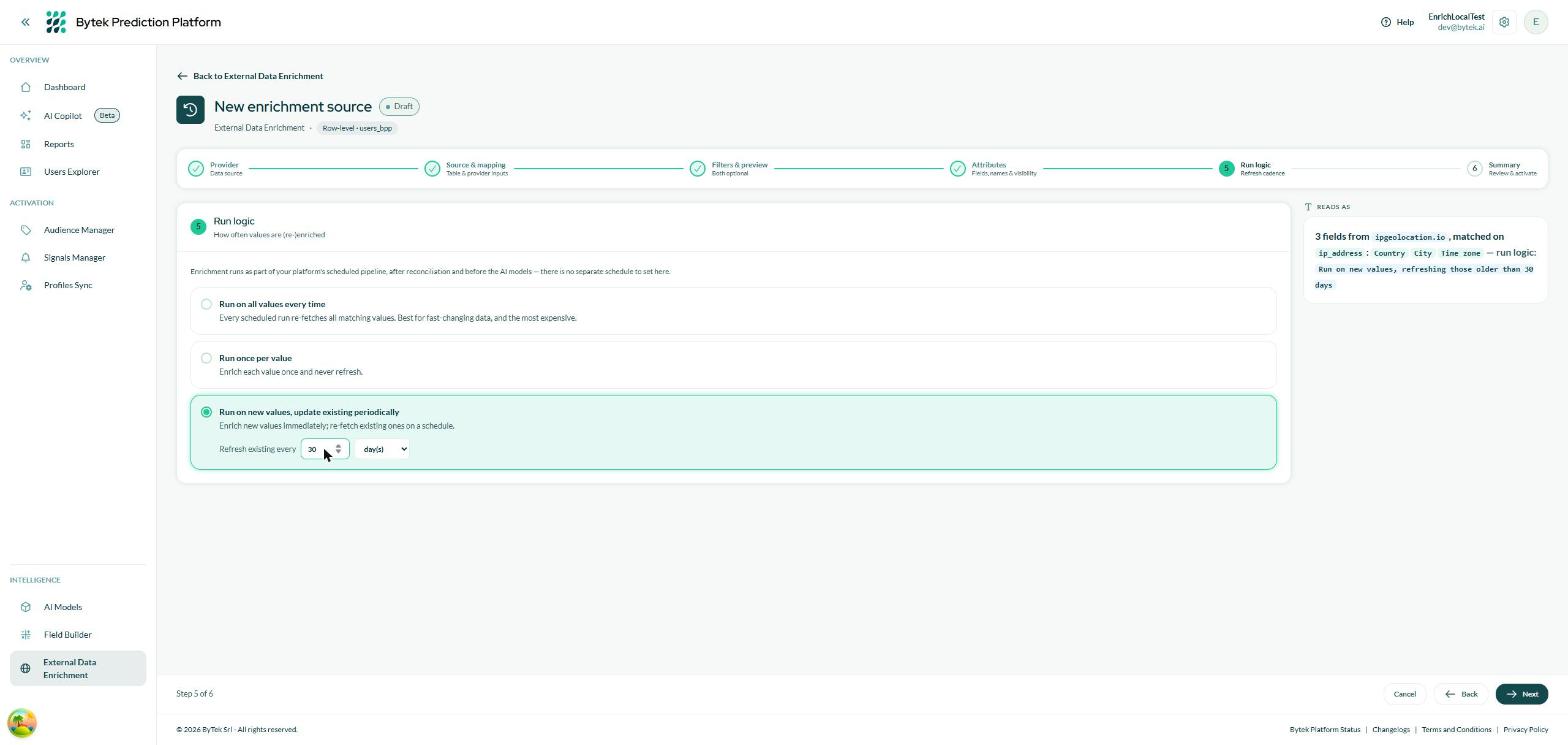
Choose how often an already-known value is looked up again.
Every option enriches values that have never been seen before, on every scheduled run. They differ only in how existing values are treated:
| Option | What it does | Use it when |
|---|---|---|
| Run once per value | A value is looked up once and never refreshed. | The answer doesn't change — the country behind an IP range, for example. Cheapest. |
| Run on new values, update existing periodically | New values immediately; existing ones re-checked once they are older than the window you set. | The default choice. Set a window in days, weeks or months. |
| Run on all values every time | Every matching value is looked up on every run. | The data changes constantly and must always be current. Most expensive. |
Enrichment runs as part of your platform's scheduled pipeline, after reconciliation and before the AI models, so the models always work on enriched data. That is why this step asks how often values are refreshed, not when the job runs.
Step 6 — Summary
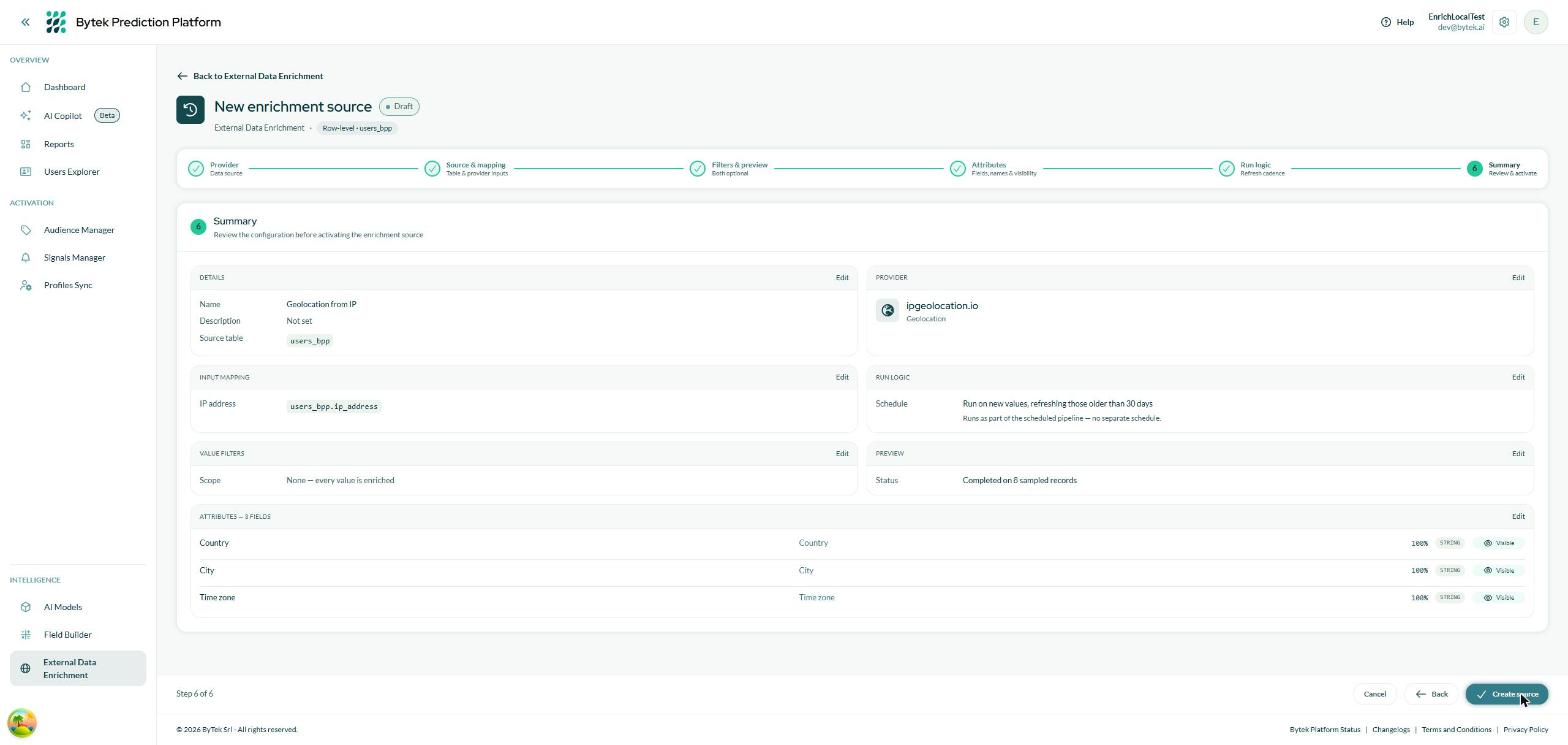
The whole configuration on one screen, with an Edit link on each block.
Check everything, then click Create source. A confirmation asks how you want to start:
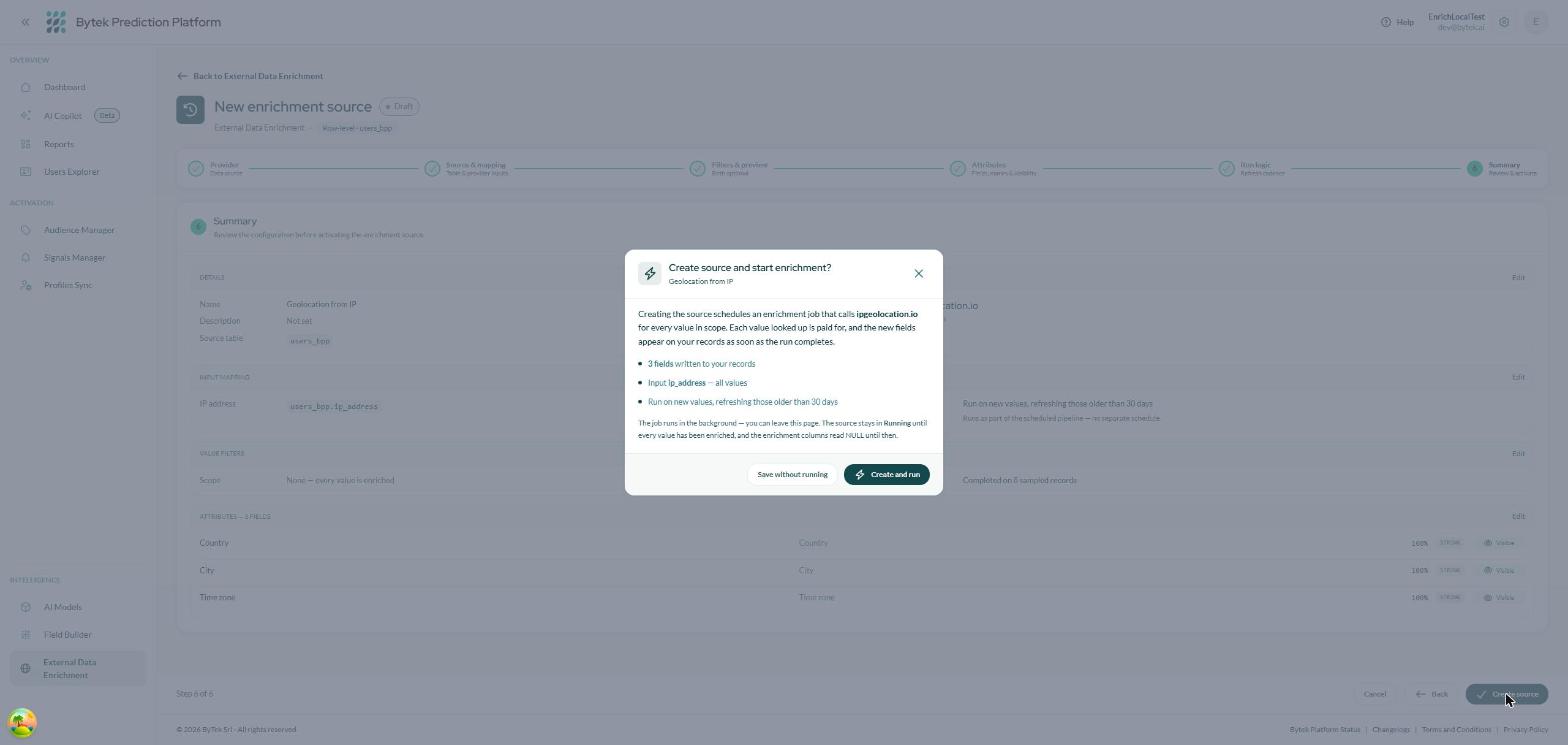
The confirmation spells out what will be looked up before anything is bought.
- Save without running — the source is created as a Draft. Nothing is looked up and no columns are created yet. You can start it later from the list.
- Create and run — the source starts immediately: the lookup runs in the background and the columns appear on your records when it completes.
The run continues if you leave the page. The source stays Running until every value has been enriched, and the new columns read empty until then.